Showing posts with label Recipes. Show all posts

Wednesday, October 1, 2014

Gluten Free Berry Ginger Delight

Last week I volunteered to bring dessert for a meeting.  I found myself wracking my brain for a dessert that would meet everyone's dietary restrictions.  It had to be lactose free, gluten free, and relatively sugar free, but NOT taste free!

Since I only had an hour prep time it also needed to be quick and easy to make.

Gluten Free Berry Ginger Delight is the experiment birthed by my brain's imagination.  Since very little remained in the pan at the end of the meeting I can only assume that everyone else enjoyed it as much as I did!

Here's what you need.

1 pkg gluten free ginger cookies

 750 mL lactose free whipping cream

2 tsp. vanilla

An assortment of fresh berries - I used sliced strawberries, blackberries, blueberries and raspberries, but pick and choose what you like

Dark chocolate squares

Crumble the cookies into the bottom of a 9" x 12" pan.  Melt chocolate and drizzle liberally over the cookies.  Sprinkle blueberries and raspberries over top. 

Whip the cream until fluffy and flavour with vanilla, spoon onto base.  Sprinkle the remainder of the berries over top, and drizzle liberally with melted chocolate.  Chill and eat.

HINT:  To drizzle chocolate - pour melted chocolate into a small zip lock bag.  Tilt bag so chocolate runs into one corner.  With sharp scissors cut a small portion of the corner off (make sure you don't cut off too much otherwise you won't be able to control the flow of the chocolate).  You now have an "icing bag" for chocolate. 

Wednesday, July 9, 2014

Strawberry Pie With Chocolate Drizzle

Normally the last week of the month is recipe week, but with strawberry season in full swing I couldn't wait to post this mouth watering creation!


What You Need:
1 frozen pie shell
2 vanilla pudding cups
1 pkg strawberry glaze (usually found with the fresh fruit in the grocery store)
4 to 5 cups fresh, sliced strawberries
1/4 to 1/2 cup dark chocolate chips

Bake the empty pie shell according to the directions on the box.  If you want to make a pie shell from scratch visit "A Plethora Of Pie" for a never-fail pastry recipe.  Cool the shell completely.

When the pie shell is cooled, spread the vanilla pudding cups over the bottom of the baked pie shell.


Follow the instructions on the strawberry glaze package to make the glaze.  Mix the sliced strawberries into the glaze and heap them into the pie shell on top of the vanilla pudding.

Melt the chocolate chips on VERY low heat.  Pour the melted chocolate into a small zip lock bag.  Squish all the chocolate into one corner of the bag, then cut a small bit of the corner of the bag off.  Drizzle the chocolate over top of the pie.

Chill for two or three hours before serving.

Enjoy!

Thursday, June 26, 2014

Home Made Creamy Caesar Salad

It's the last week of the month and that means recipe week.  Normally I try to post a recipe for a super easy or extra ordinarily yummy dessert, but I thought I'd deviate from the norm this month.

Canada Day is coming and that means picnics and potlucks and the need to bring some food item to share.  What better thing to feed your friends than a home made caesar salad that puckers them up and leaves their taste buds quivering for more! 

And yes, it's easy to make...right down to the croutons!

So let's start there...

Super Easy Home Made Croutons

Toast two or three slices of your favourite bread until it's fairly well done.  Cut the toast into cubes. 

Melt about 1/4 cup butter in a 9 inch x 9 inch pyrex pan in the microwave.  Sprinkle in garlic salt and garlic powder - go a little lighter on the garlic salt so it's not too salty.  Stir this around and dump in the toast cubes.  Mix well until the butter is absorbed.

Broil this for a few minutes, stirring periodically until the croutons are nice and crispy.  Pull the pan out of the oven and let the croutons cool.

(Quite often I'll use left over hot dog or hamburger buns that happen to be in the freezer just to use them up.)

Creamy Caesar Dressing

1/2 cup mayonnaise
1 tsp. Worcestershire sauce
2 tbsp. lemon juice
1 minced clove of fresh garlic

Stir all ingredients together in a bowl.  Chill in the fridge for a couple of hours so the flavours can blend.

NOTE
For extra tangy dressing add extra lemon juice to taste (using the juice of 1/2 a squeezed lemon works well too)

NOTE:  This recipe is enough for one large head of romaine lettuce.

The Salad
  • 1 head of fresh romaine lettuce - I like the full head with the dark green leafy parts instead of just the romaine hearts
  • Home made croutons
  • Bacon bits - you can use store bought, but if there's left over bacon from a weekend breakfast, I cut it up and store it in the freezer so it's ready to toss into a salad.
  • Green onions (optional)
  • Parmesan cheese - I leave this out due to my lactose intolerance and my husband's extreme loathing of the "stinky foot cheese", but typically Caesar salad should have Parmesan included in it - fresh if you have it - otherwise the dried grated version works.
Mix this all together, pour the dressing over top, and toss well.

NOTE:  Caesar salad is always best eaten fresh - if it sits for an extended period of time I find it turns rather slimy and, while the flavor is still good, the texture and aesthetic qualities leave something to be desired.

Enjoy and happy Canada Day weekend!


Sunday, December 29, 2013

Easy Meringue Dessert

 Looking for a light dessert for your New Year's dinner party?  One that doesn't require a lot of effort, but looks and tastes like you spent hours in the kitchen creating the concoction?  Look no further.  This easy to make, decadent dessert will leave your guests asking for seconds. 

It's best to make the meringues the evening before, then put the layers together the morning of your dinner.  This gives the flavours time to blend.


STEP 1 - MERINGUE BASES

4 egg whites
1/4 tsp. cream of tartar
1 cup white sugar
1 tbsp. cocoa

Line two flat cookie sheets with tin foil.  Draw an 8" diameter circle on both pieces of tin foil.  Lightly grease the inside of the circles.  Heat oven to 250 degrees F.

Beat egg whites and cream of tartar until soft peaks form.  Gradually add white sugar, beating until egg whites become very stiff.  Sift cocoa over top and fold in with a spatula.

Spoon 1/2 of egg white mixture into each circle, spreading evenly around.  Bake for 1 hour at 250 degrees F.  Then turn oven off and let sit in oven for another hour.  Now remove from oven and allow to cool completely.

STEP 2 - CHOCOLATE FILLING

1 cup semisweet chocolate chips
3 tbsp. water

Combine chocolate chips and water in a small pot.  Melt over very low heat, stirring constantly until a smooth chocolate mixture is formed. 

Gently loosen each meringue from the foil.  Spoon half of the chocolate mixture onto the top of one meringue and spread evenly, then do the same with the second.  Try not to apply too much pressure when spreading as the meringues are fragile.

STEP 3 - TOPPING

2 envelopes Dream Whip (not whipped, just the powder)
1 cup milk
2 tsp. cocoa
1/2 pkg Skor bits (about 1 cup)

Put the Dream Whip powder, milk, and cocoa in a bowl.  Beat until stiff.  Fold in the Skor bits. 

Spread half the topping over the chocolate on each meringue.  Now gently lift and place one meringue on top of the other.  The meringue may collapse under the weight at this point, but it's OK.  It doesn't change the look or the taste.

Grate some chocolate over top for garnish.  Allow to chill in the fridge for six to eight hours before serving.

Enjoy!

Saturday, November 30, 2013

Cherry Dream Slice

Christmas is coming and with it comes the pressure that it HAS to be perfect. 

Before your head explodes from the realization you're never going to get everything done in time consider this...

Just because it's tradition doesn't mean you HAVE to do it! 

Remember the Grinch?

In his attempt to put an end to Christmas, he takes away everything that, in his mind, "makes" Christmas for the Who's.  We all know what happens.

"...It came without ribbons!  It came without tags!  It came without packages, boxes or bags!" (From "How The Grinch Stole Christmas" by Dr. Seuss)

And then we glean great wisdom from our beloved Dr. Seuss...

"Maybe Christmas...doesn't come from a store.  Maybe Christmas...perhaps...means a little bit more!". (From "How The Grinch Stole Christmas" by Dr. Seuss)

Wise words to keep in mind as we move into the Advent season.

So, in an effort to simply your life, and NOT have your head explode, but still satisfy everyone's desire for home made treats I give to you...a sweet, cherry Christmas-y treat that takes very little time or effort...Cherry Dream Slice.

CHERRY DREAM SLICE


Shortbread Base
1/2 cup butter
1 1/4 cups flour
3 tbsp. sugar
Mix together and pat into an 8 x 8 inch pan.  Bake at 325 degrees for 25 minutes.  Let cool.

Filling
24 marshmallows
1 small mashed banana
15 drained maraschino cherries, chopped

Butter the inside of a double boiler.  Put in marshmallows and melt, stirring regularly.  (If you don't have a double boiler use a standard pot on very low heat.  Stir regularly so marshmallows don't burn.). When marshmallows are melted stir in banana and cherries.  Spread on shortbread base.  Let cool.

Icing
1/4 cup butter
1/4 tsp. vanilla
1 cup icing sugar
A drizzle of milk

Beat butter until smooth, add icing sugar, vanilla, and a small drizzle of milk.  Beat until smooth.  Add small amounts of milk as necessary until you have a soft icing of spreading consistency.  Spread over top of slice.  Refrigerate.

Thursday, October 3, 2013

Schmoo Torte

In celebration of the release of lactose free whipping cream, I give to you....

Schmoo Torte

If you're from the province of Manitoba you've probably heard about this delightfully, delectable dessert.  If you're from any where else you're probably wondering what I'm talking about.

Picture angel cake meets chiffon cake, filled and wrapped in whipped cream, and topped off with a decadent home made caramel sauce.

Can you say YUM...and GIVE ME MORE!!!!!


Lactancia brand has released a lactose free whipping cream, so all those off limit desserts for people with lactose intolerance are now back on the menu.

Now if only I could say fat free...NOT!


Looking for a relatively easy dessert for Canadian Thanksgiving next weekend?  Look no further...Schmoo Torte is here!

CAKE
8 egg yolks

8 egg whites
1 cup white sugar (divided in half)
1/2 cup flour
1 tsp. baking powder
1/4 tsp. cream of tartar
1/2 tsp. vanilla
1 cup finely chopped pecans

Spray the bottom of an angel cake tube pan with Pam.  Heat oven to 350 degrees F.  Beat eggs whites until almost stiff.  Gradually add cream of tartar and 1/2 cup of the sugar.

In another bowl beat egg yolks until light and add remaining sugar and vanilla.  Fold into egg whites.  Now fold in flour and baking powder.

Fold in chopped nuts.  Pour batter into pan and bake 1 hour and 15 minutes.  Remove from oven and turn upside to cool. 

When cool remove from pan and cut into three equal layers.

FILLING
500 mL whipping cream
3 tbsp. icing sugar
1 tsp. vanilla

Whip the whipping cream and sweeten with sugar and vanilla.  Spread between layers, restack the layers, then cover top and sides with whipped cream.

CARAMEL SAUCE
250 mL whipping cream
3 tbsp. butter
1 1/2 cups brown sugar

Put whipping cream, butter, and brown sugar in a small pot.  Bring to a boil.  Remove from heat and cool.

Just before serving drizzle some of the sauce over the torte.  Serve remaining caramel sauce on the side for extra yum factor!


Friday, August 2, 2013

A Plethora of Pie

It's summer and that means fruit season.  Fresh strawberries, rhubarb, blueberries, raspberries, peaches, apricots, plums...the taste buds quiver in anticipation of juicy, sweet, fruity treats.

And guess what!  Fruit season heralds the arrival of PIE season!  Sure, you can make pie from frozen fruit, but there's no better pie than one that comes from plump, juicy, fresh fruit.

So here you have it...a plethora of pie!  Strawberry/rhubarb, blueberry, and peach/blueberry.  Use the basic pie crust, and just pick your favourite fruity filling.

Here's the never fail pastry recipe I included a little while ago with the pecan pie recipe.

Never Fail Pastry

- Use the full recipe and freeze the rest.

5 cups flour
2 tsp. salt
2 tsp. baking powder
2 cups Tenderflake or Crisco lard (shortening)
1 beaten egg
1 tbsp. vinegar

Mix flour, salt, and baking powder together.  Cut the lard into the flour mixture until crumbly.  (HINT - if you have a Kitchenaide it makes easy work of this step, then you can hand mix the rest)

Beat the egg in a glass measuring cup, add the vinegar, then add enough cold water to make 3/4 cup of liquid.

Add the liquid mixture to the flour crumb mixture and mix by hand - knead a couple of times on a hard surface to completely mix.

NOTE:  If you want to 1/2 this recipe use the whole egg and just half of the other liquid ingredients.


Now pick your favourite filling from the recipes below, or better yet, make a pie a week for the next three weeks!  :) 

Strawberry/Rhubarb

2 1/2 cups rhubarb, chopped
2 cups strawberries, halved
1 1/4 cups sugar
5 tbsp. flour
1/4 tsp. salt

Line an ungreased pie plate with pastry.  Mix dry ingredients together; add rhubarb and strawberries.  Mix well and place in uncooked pie shell.  Cover with the top crust.  Brush with milk and sprinkle with sugar.  Bake at 450 degrees for 15 minutes, then reduce heat to 350 degrees and bake about 50 minutes longer.


Blueberry


4 cups blueberries
2 tbsp. flour
2/3 cup flour
1/4 tsp. salt
1 tbsp. lemon juice
1/2 cup brown sugar
1 tbsp. butter

Combine blueberries, flour, white sugar, salt, and lemon juice.  Stir together and let stand for 10 minutes.  Line a pie plate with pastry.  Pour in blueberries, sprinkle with brown sugar and dot with butter.  Cover with top crust.  Bake 35 - 45 minutes at 425 degrees.


Peach/Blueberry

2 tbsp. lemon juice
3 cups peeled, pitted, sliced peaches (for step by step instructions on peeling peaches go to http://localfoods.about.com/od/summer/ss/PeelPeach.htm
1 cup blueberries
1 cup sugar
2 tbsp. quick cooking tapioca
1/2 tsp. salt


Put peaches and blueberries in a bowl and sprinkle with lemon juice.  Mix sugar, salt, and tapioca in a separate bowl.  Toss lightly with fruit.  Let stand 15 minutes.  Turn into pastry and cover with top crust.  Bake 45 to 50 minutes at 425 degrees.


Wednesday, June 26, 2013

Rhubarb Cake

It's officially summer and that means rhubarb season.  What better way to kick off the Canada Day long weekend than with a snack of yummy, moist, rhubarb coffee cake!

CAKE:
1/2 cup butter1 1/2 cups white sugar
2 eggs
1 cup sour cream
1 tsp. vanilla
2 cups flour
1 tsp. baking soda
2 cups finely chopped rhubarb.

Heat oven to 350 degrees F.  Spray a 9 x 13 pan with cooking spray.

Cream butter and sugar, beat in eggs.  Stir in sour cream and vanilla.  Add flour and baking soda and fold into batter.  Stir in rhubarb.  Scrape into a 9 x 13 pan and spread evenly over the bottom.

TOPPING:
1/2 cup brown sugar, packed
1 tbsp. flour
1 tsp. cinnamon
1 tbsp. butter

Mix all ingredients together until crumbly, sprinkle overtop of batter in pan. 

Bake at 350 degrees F for 30 to 40 minutes.

Enjoy!

Wednesday, May 29, 2013

Lemon Slice

This slice has a shortbread base, a soft lemon filling, and a crispy, meringue-like top.  It's as easy to make as it is to eat!  Enjoy!

BASE
2 cups flour
1/2 cup white sugar
1 cup margarine/butter

Heat oven to 350 degrees F.  Grease a 9 x 13 pan.  Mix all three ingredients together into a crumb-like consistency.  Put into pan and press over the bottom with a fork.  Bake at 350 degrees F for 20 minutes.  Cool.

TOPPING
4 beaten eggs
2 cups white sugar
1/3 cup lemon juice
1/4 cup flour
1/2 tsp. baking powder

Beat all the topping ingredients together until light and fluffy.  Pour over the cooled shortbread base.  Bake at 350 degrees F for 25 to 30 minutes.

Sprinkle with icing sugar.  Cool and slice into squares.

Thursday, March 28, 2013

Pecan Pie

You know you're in trouble when your sister calls you to see if you're OK because you haven't posted anything on your blog for three weeks.  This actually happened tonight.

So, my apologies to my readers.  I know I've neglected you the last few weeks.  I had a car accident six weeks ago.  Car shopping (ick) and physiotherapy (ouch) have devoured my free time faster than grasshoppers chowing down on a field of newly headed wheat! 

I do intend to get back to regular posting!

On that note, this is the last week of the month and that means recipe week!  I wondered what ooey gooey delight I could post to serve as a sweet finishing touch to Easter dinner and the answer came in the form of pecan pie!

You can thank my husband for this recipe.  A few years back I discovered his favourite pie was pecan (a pie I had never made before).  The quest for a good recipe was on!  Everyone who's had the pleasure of tasting this pie remains eternally grateful to him!

A warning comes attached to this pie.  It's very sweet and rich.  A cup of tea or glass of cold milk are mandatory accompaniments to it.

For the really adventurous I'm including a never fail pastry recipe.  Guaranteed to be light and flaky every time - no concrete pastry from this recipe!  But, if you don't feel up to the challenge, just go pick up a frozen pie crust and throw in the filling.  People will think you slaved over a hot stove all day!

NEVER FAIL PASTRY
- one recipe makes enough for four covered pies - the extra pastry freezes well

5 cups flour
2 tsp. salt
2 tsp. baking powder
2 cups Tenderflake or Crisco lard (shortening)
1 beaten egg
1 tbsp. vinegar

Mix flour, salt, and baking powder together.  Cut the lard into the flour mixture until crumbly.  (HINT - if you have a Kitchenaide it makes easy work of this step, then you can hand mix the rest,)

Beat the egg in a glass measuring cup, add the vinegar, then add enough cold water to make 3/4 cup of liquid.

Add the liquid mixture to the flour crumb mixture and mix by hand - knead a couple of times on a hard surface to completely mix.

NOTE:  If you want to 1/2 this recipe use the whole egg and just half of the other liquid ingredients.

PECAN PIE FILLING


1 cup corn syrup
1 cup brown sugar
1/3 tsp. salt
1/3 cup melted butter
1 tsp. vanilla
3 eggs
1 1/2 cups roasted pecans

Roast the pecans:
Put 1 1/2 cups pecans on a plate and put in the microwave.  Microwave on high for two minutes.  Turn them over a few times, put them back in for one more minute.  Use a knife to cut pecan into large chunks.


Preheat oven to 350.

Mix together syrup, brown sugar, salt, melted butter and vanilla.

Beat eggs in separate bowl and add to batter.  Stir until it looks like it did before you added the eggs.

Pour the filling into an unbaked pie shell. Sprinkle the pecans on top.

Bake for one hour to one hour and ten minutes. Pie is done when a knife can be stuck into the centre of the pie and come out clean.

Enjoy!

Wednesday, February 27, 2013

Easy Microwave Brownies

If you like chewy brownies you'll love this recipe.  It's easy, super fast to mix, and cooks for only 10 minutes in the microwave. 

Spread on some Betty Crocker chocolate icing and you can't go wrong! 

MICROWAVE BROWNIES

In a pyrex mixing bowl measure:

1 tbsp. water
2 squares unsweetened (or semi-sweet) chocolate
1/3 cup butter

Cook this for 1 minute in the microwave on high.  Stir, then cook for another 30 seconds, or until completely melted.  Be careful not to over cook and burn the chocolate.

Stir in 1 cup white sugar.
Beat in 2 eggs and 1/2 tsp. vanilla.
Add 3/4 cup flour, 1/2 tsp. salt, and 1/2 tsp. baking powder
Stir until mixed.

Add 1/2 cup nuts (optional - I make it without)

Spray an 8" x 8" glass pan with Pam.  Pour batter into pan.

Cook in the microwave at 70% power for 10 minutes.  (This assumes you have a turn table.)

*IF YOU DON'T HAVE A MICROWAVE WITH A TURN TABLE...
Cook 2 1/2 minutes on high, turn 1/2 turn, cook another 2 1/2 minutes on high.

If the cake pulls away from the sides of the pan it's done.  If it's not done, put it in for another 2 minutes.

HELPFUL HINT:

DO NOT keep cooking until the brownies look nice and dry on top, like a cake baked in the oven.  If you do this you'll be chiseling a chocolate brick out of your pan that you can use to stucco the outside of your house!

Remember you're using the microwave.  The
brownies continue to bake after they're removed from the microwave.  They may be pulling away from the pan but still look a little sticky on top.  This is OK.

Let them cool to room temperature, slather on the icing, and enjoy!

Wednesday, December 12, 2012

Orange Chocolate Snowballs

Last year I posted a recipe for snowballs and cherry snowball candy made with mashed potato.  I know it sounds weird, but they're actually quite tasty.

A few weeks ago, after making the annual Christmas snowballs, my husband and I had an impromptu fruit fondue with the left over melted chocolate.  There's something just so incredibly yummy about the taste of chocolate and orange!

My brain started working and I thought...orange chocolate snowballs.

So for anyone wanting to experiment with some tasty Christmas candy here are some guidelines for orange snowballs.

1 small to medium sized potato
Grated peel from one large orange (navel, not mandarin)
Approximately 1 cup icing sugar (this will vary based on the size of potato)
1 tsp. orange extract
Drop of red and yellow food colouring
Semi sweet baker's chocolate, or dark chocolate dipping wafers

Boil the potato until done.  Mash it and allow it to cool.  Put into mixing bowl with the grated orange peel.  Beat in 1 cup icing sugar and 1 tsp. orange extract.  Add a couple of drops of yellow food colouring and one red - enough to make a light orange tint. 

Beat in enough icing sugar to make a soft dough. 

Roll into small balls and place on a cookie sheet lined with waxed paper.  Allow them to set for two or three hours. 

Melt chocolate.  Place rolled snowball on fork held over chocolate pot.  Spoon chocolate over snowball, then use a knife to slide the snowball onto the waxed paper.

Voila, an orange, chocolaty treat!

Thursday, November 29, 2012

Cranberry Almond Bark


Looking for a sweet, crunchy holiday treat?  Cranberry almond bark is almost as easy to make as it is to eat!


HERE'S WHAT YOU NEED:
8 cups white chocolate
1 1/2 cups roasted almonds (if you can't find roasted almonds buy regular baking almonds and roast them yourself)
1/2 cup dried cranberries

TO ROAST ALMONDS:
Spread almonds in a single layer on a cookie sheet.  Bake at 350 degrees F for 10 to 15 minutes.  Make sure you don't burn them.  Let cool.  Chop coarsely (it's OK to have some whole almonds).

PREPARE PAN:
Line two cookies sheets with parchment paper.

Melt chocolate over hot water.  Stir in almonds and cranberries.  Pour mixture into parchment paper lined cookie sheets.  Chill.  Break into chunks and enjoy!

Thursday, November 1, 2012

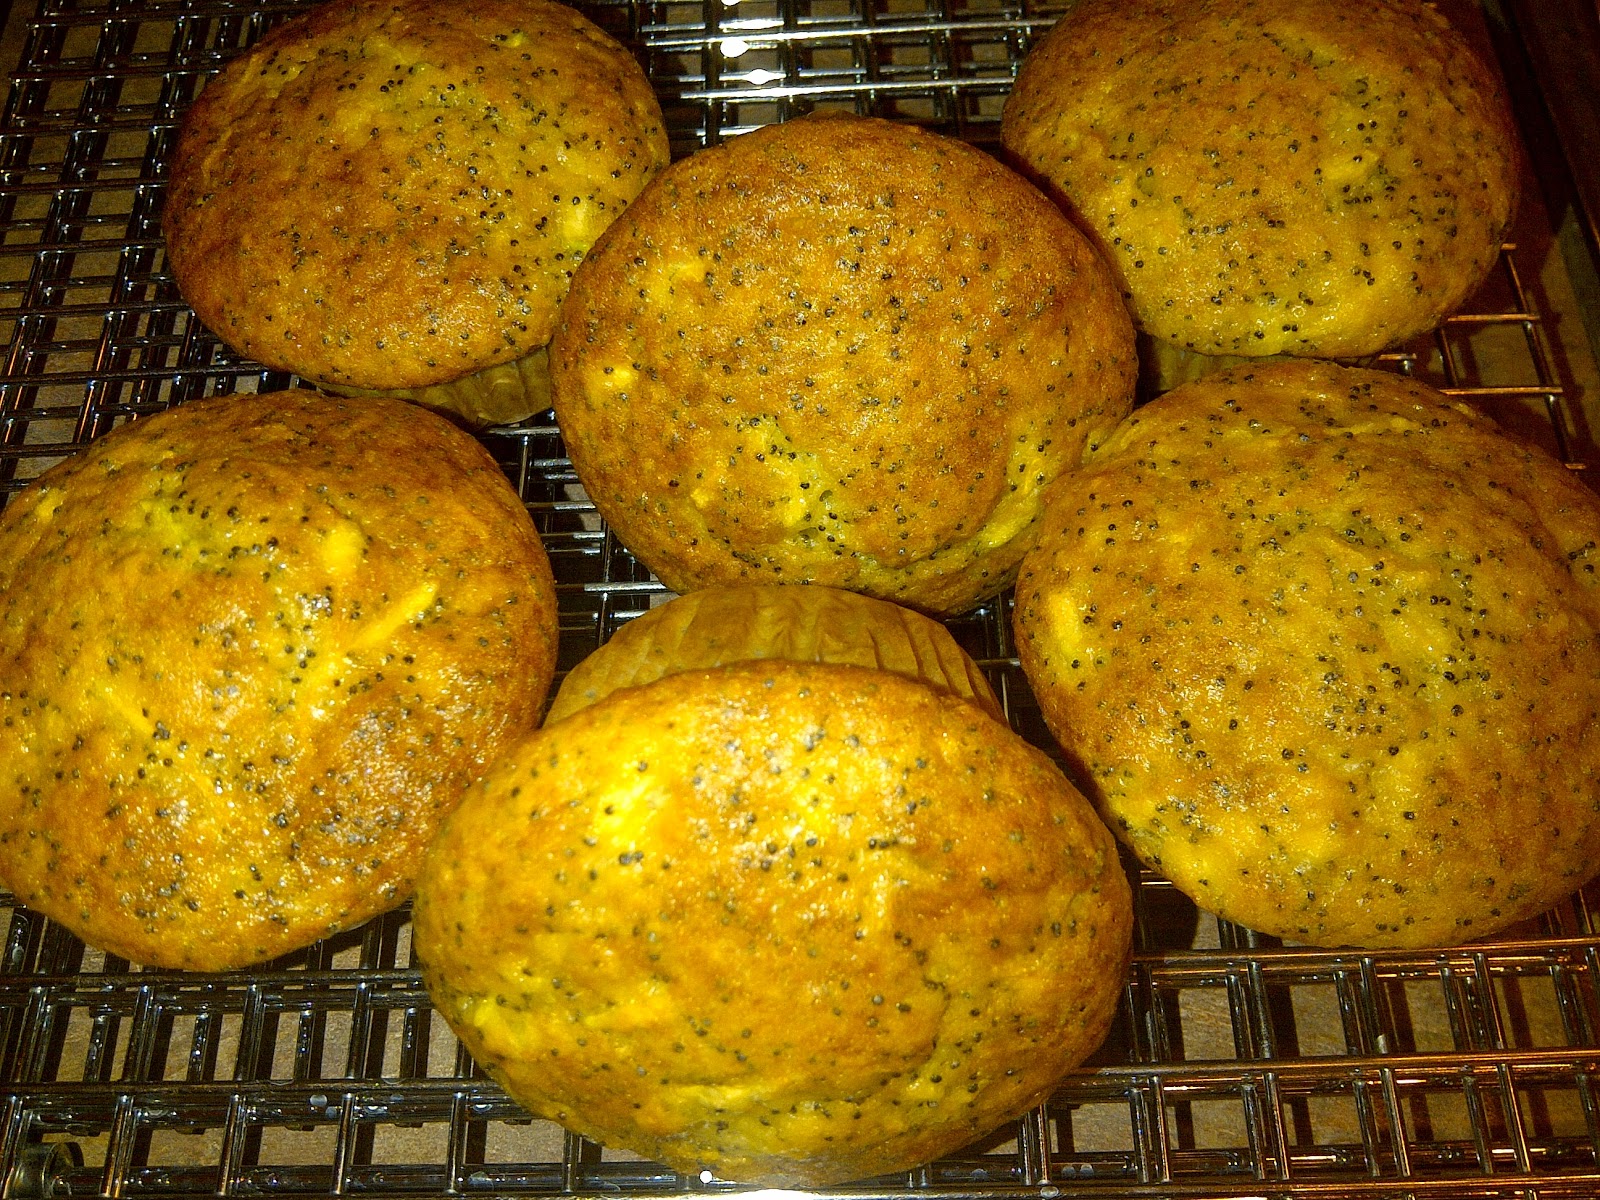
Lemon Zucchini Poppyseed Muffins

I thought I’d throw one more zucchini recipe out there in case some of you still have some of that prolific fall squash hanging out in your fridge or pantry.

This recipe works quite well with yellow zucchini.  If you’re going to use green, I recommend peeling it first.  Green skin in yellow muffins is a little disturbing.

Lemon Zucchini Poppyseed Muffins (Makes about 26 muffins)

4 eggs
1 ½ cups milk
¾ cups oil
2 cups grated zucchini
Juice and grated rind from 2 lemons
1 tsp. lemon extract
½ cup poppyseeds
4 cups flour
1 tbsp. baking powder
1 ½ tsp. baking soda
1 tsp. salt
1 pkg (4 servings) lemon instant pudding powder
1 ½ cups sugar

Beat eggs, milk, and oil together.  Add zucchini, lemon rind, lemon juice, lemon extract, and poppyseeds and mix together.

Add flour, baking powder, baking soda, salt, instant pudding powder, and sugar and mix together until well blended.

Spoon into muffin cups and bake at 350 degrees for 20 to 25 minutes.

NOTE: 
My apologies to my regular readers who expected a memory verse last weekend and didn't get it.  Somehow there just wasn't enough time last week to fit everything in and I'm afraid my blog suffered as a result.  Please watch for a new memory verse post coming this weekend.

Wednesday, September 26, 2012

Pumpkin Cupcake Surprise

The mornings are colder, the days are shorter, and the leaves are changing colour.  It must be fall.  I dream about the hot, humid days of summer, but I still look forward to fall. 

I love this time of year.  Sunlight filters through branches dripping with oranges and golds.  Dry leaves beg to be scrunched underfoot.  Do I smell the scent of turkey in the air?

Canadian Thanksgiving is only two weeks away.  I'm excited.  Turkey is one of my favourite foods and two gobblers recline in our freezer, awaiting the anticipated day.

This month's recipe can accompany pumpkin pie as an added dessert on your Thanksgiving dinner table. 

These cupcakes aren't overly sweet, have a touch of cinnamon, and are bursting with creamy surprise filling.

Even the colour of the batter screams autumn.  It's such a vibrant orange, it could almost masquerade as orange sorbet.  The pan was so pretty I almost didn't want to bake them!

Here's the recipe.


Pumpkin Cupcake Surprise

CUPCAKES (makes about 18)
2 cups white sugar
1 can (498 mL) pumpkin (just pumpkin, not pie filling)
3/4 cup canola oil
4 eggs
2 cups flour
1 tsp. salt
2 tsp. baking soda
1 tsp. cinnamon
1 tsp. baking powder

Beat sugar, oil, pumpkin, and eggs until well blended.  Add flour, baking soda, salt, baking powder, and cinnamon and mix into pumpkin mixture until well blended.

Fill paper-lined muffin cups 2/3 full and bake at 350 degrees for 20 minutes.  (You might need a little longer depending on your oven.)  Test them by poking a toothpick into the middle.  If it comes out clean (with no batter on it) they're done.

Let cool for about 10 minutes.  Remove from pans and let cool completely.

FILLING
1 tbsp. cornstarch
1 cup milk
1/2 cup vegetable shortening
1/4 cup softened butter
2 cups icing sugar
1/2 tsp. vanilla

Mix cornstarch and milk in a small pot over medium heat.  Bring to a boil (it will stick so make sure you stir this constantly).  Remove from heat and cool to room temperature.

Beat the shortening, butter, icing sugar, and vanilla until light and fluffy.  Gradually add the cornstarch mixture and beat until smooth.  (This may take a lot of beating.  If it looks like the mixture is lumpy and separating, keep beating.  It will eventually get the smooth consistency of butter cream icing.)

Using a sharp knife, cut a small circle about 1 inch deep into the top of each cupcake.  Remove the top.  Spoon or pipe the filling into each cupcake.  Replace the top.

Enjoy!

Thursday, August 30, 2012

Chocolate Zucchini Cake

It's the end of August and that can only mean one thing...

'Tis the season of the prolific giant zucchini! 

If you've ever planted zucchini in your garden you have an appreciation of how prolific this long green squash is.  Plant two plants and you're supplying the entire community with zucchini to last through winter and well into spring.

Right now you probably feel akin to the Egyptians in Exodus chapter 8 who were afflicted with the plague of frogs.  The difference is your plague is long and green and doesn't tend to hop around your garden.

Bear with me while I adlib for a moment...

The community shall swarm with zucchini that shall come up into your house and into your bedroom and on your bed and into the houses of your servants and your people, and into your kneading bowls and your ovens.  The zucchini shall come up on you and on your people and on all your servants.

If you try this recipe you'll be very happy to have the zucchini come up into your kneading bowls and your ovens!  This cake is super moist and you'd never know there was an ounce of zucchini in it.  Enjoy!

Chocolate Zucchini Cake

Cream together:
½ c. soft margarine
½ c. vegetable oil
1 3/4 c. sugar

Add:
2 whole eggs
1 tsp. vanilla
½ c. sour milk (if you don't have sour milk add a bit of vinegar to the measuring cup)

Beat with a mixer.

Mix dry ingredients (below) together and add to creamed mixture.  Beat well.
2 ½ c. flour
4 tbsp. cocoa
½ tsp. baking power
1 tsp. baking soda
½ tsp. cinnamon

Stir in 2 cups finely diced (not shredded) zucchini

Spoon batter into greased and floured 9 x 12 x 2 pan. Sprinkle top with ½ cup chocolate chips or more if you like (these are optional).  Bake in 325 degrees oven for 40 to 45 minutes or until done.


Wednesday, July 25, 2012

Rich Chocolate Candy

A lot of the recipes I post are ones I remember using as a teenager.  Generally I haven’t used them for quite a number of years and it’s fun to resurrect them and let my taste buds take a walk down memory lane.

I always make a point of trying them out before I post just in case my taste buds suffered from some teenage food tasting weirdness that has since abated with adulthood.

This week was an interesting week in the blog kitchen.  Last month I wrote about my memories of making fudge and posted a Five Minute Fudge recipe. 

That one is quite sweet so for those of you who desire something a little more cocoa flavoured, and don’t want to be bothered boiling anything; I decided to post the other easy Rummoli night favourite - a “no cook” fudge recipe.

I rooted through my cupboard trying to unearth the long forgotten recipe.  I had vague memories of ingredients including a chocolate pudding mix and cornstarch. 

One of my mother’s recipes for chocolate fudge made with chocolate pudding mix finally came to light.  There was no cornstarch which threw me a little (something didn’t seem quite right) but I forged ahead.

The recipe said to put the pudding mix, 2 tbsp. of butter and ¼ cup of milk in a pot and boil it for one minute, stirring constantly, as it would easily stick and burn.

About 30 seconds after I poured in the milk I had major doubts.  I stirred the three ingredients together and balefully eyed a shiny, black, congealed mass in the bottom of my pot.  It looked like something I’d peeled out of the cracks in the concrete on the street. 

Hopeful it would liquefy after the application of heat I attempted to stir the gelatinous blob residing in the pot.  It was futile hope.  Here’s what I ended up with...


I messed around with it a bit, giggling helplessly while adding milk and icing sugar, but to no avail.  There was no redemption for this black blob, short of being turned over to the oil refineries as bitumen.  It hit the bottom of the eco-bin with a heavy, wet splat!

You’ll be happy to know that’s not the recipe I’m posting this week.  I called my sister (still giggling helplessly) who bailed me out (laughing the whole time) by giving me the recipe I wanted in the first place.  The end result of this second attempt is a little more appealing.


As long as you can melt butter in the microwave you can make this recipe.  It’s super easy, and feeds the desire for instant gratification because you can eat it within about half an hour of making it.  I hope you enjoy it.

Do you have any cooking disasters that sent you into fits of laughter?  Share them by clicking on “comments” below.

RICH CHOCOLATE CANDY

Spray an 8” x 8” pan with cooking spray or coat with margarine or butter.

Measuring the following dry ingredients into a mixing bowl:
2 cups icing sugar
½ cup cocoa
½ cup cornstarch

Melt ¾ cup butter in the microwave.  Pour the melted butter and 1 tsp. vanilla into the dry ingredients.  Stir this together quickly (it sets up in no time so make sure you’re ready to stir when you add the butter and vanilla).  Pat into the pan and allow to cool.  Cut into squares and enjoy!